

This post contains affiliate links.
On The Table Read Magazine, “the best arts and entertainment magazine UK“, turn common household items into charming, budget-friendly upcycled Christmas crafts with fifteen simple projects that save money, reduce waste, and add handmade warmth to your seasonal decor.
Christmas decorating often leaves a trail of empty cans, torn boxes, odd buttons, and lidless jars that many people simply toss once the season ends. However, these common household items still possess great shape, color, and texture, making them ideal for creating budget-friendly and sustainable Christmas decor. Fifteen simple upcycling ideas use everyday materials like tin cans, wool scraps, shipping boxes, glass bottles, jar lids, corks, cereal boxes, paper bags, denim pockets, egg cartons, wooden spoons, old magazines, old drawers, and leftover fabric to craft handmade holiday charm without costly supplies or advanced skills.
Before starting any craft project, set up a designated box for clean materials by washing and drying cans, jars, and bottles while smoothing sharp edges and removing loose staples. Simple color choices such as white paint, kraft brown, deep green, red ribbon, and soft gold help tie mixed materials together across wool trees, bottle vases, cereal-box tags, magazine baubles, and fabric wreaths. Crafters can match specific items to the right displays, using tin cans and paper bags as lanterns, corks, spoons, and jar lids for small ornaments, and old drawers to hold full Christmas tree scenes.
Safety and strength remain key priorities when working with recycled holiday decor. Battery-operated tea lights should always be used for paper, cardboard, and fabric projects, while real candles require heat-safe holders and constant supervision. Allowing paint and glue to dry fully, using hot glue with care, and adding strong twine or wire for wreaths and garlands ensure durability. Small, visible handmade touches like mismatched scarves on wooden spoon snowmen or denim pockets filled with treats give each piece distinct character and warmth.
15 Upcycled Christmas Crafts That Turn Everyday Clutter into Festive Decor (You’ll Never Toss These Again!)

1. Tin Can Luminaries with a Cozy Candle Glow

Warm candlelight and punched metal bring a simple farmhouse mood to holiday decorating. Empty soup or coffee cans offer a sturdy base, while star, tree, and snowflake holes scatter gentle patterns across nearby walls. Paint them deep green, warm white, muted red, or antique gold for a collected Christmas palette. Editor’s Choice
Freeze water inside each clean can before adding the design. The ice supports the metal while you tap holes with a nail and hammer. After the ice melts, smooth sharp edges, then add a wire handle or twine wrap. Battery tea lights work best around children, pets, paper, and indoor greenery.
Try these simple finishing ideas:
– Punch stars, dots, or trees around each can
– Paint thin coats for a softly handmade finish
– Attach wire handles near the upper rim
– Cluster different can sizes along a mantel
Use a short can for candy canes or pine sprigs, and reserve taller cans for lights. Group three on a porch step, tray, or dining table for a cozy glow. Recycled metal, rough brush marks, and natural greenery make this decor feel useful, warm, and personal.Tin Can Luminaries with a Cozy Candle Glow

DIY Doctor Thorn Proof Gardening Gloves for Women, Leather, 1 Pack
 AmazonUSD 11.92

Grevosea 5-Pocket Cleaning Apron for Housekeeping, Black Waist Apron
AmazonUSD 7.94
2. Wool Sweater Scrap Christmas Trees

Soft fabric trees add warmth without bringing more hard plastic into your holiday display. Felted wool, thick cotton, and worn sweater pieces hold their shape while offering cozy colors such as oatmeal, cranberry, forest green, and charcoal. Cable knit, ribbed cuffs, and uneven seams give each tree a rich texture. Editor’s Choice
Cut two matching triangles from damaged sweater sections, then place scrap fabric or a little stuffing between them. Stitch around the edges with chunky thread, or use fabric glue for a quick child-friendly version. A cinnamon stick, twig, wooden skewer, or wine cork can create a simple trunk and base.
Give each little tree a distinct personality:
– Stitch mismatched buttons onto the front
– Add cinnamon-stick trunks for natural fragrance
– Mix cable knit with smooth sweater scraps
– Hang ribbon loops from the pointed tops
Keep the colors related instead of making every tree identical. Stand them on a shelf, coffee table tray, or reclaimed wood block. Their soft texture suits homes with children, and the light weight makes them easy to mail as handmade gifts. Every loose fiber and tiny flaw reminds you that an old garment found a thoughtful second life.Wool Sweater Scrap Christmas Trees


Comforso Patchwork Kits Fairy Patchwork DIY Kits Christmas Gnome Red 1 Set
AmazonUSD 13.23
Asdirne Fabric Scissors, Dressmaking Scissors with Heavy Duty Titanium P…
AmazonUSD 7.94
3. A Cardboard Gingerbread Village from Shipping Boxes

Natural cardboard creates a warm gingerbread village with almost no material cost. Shipping boxes already provide strong walls, peaked roofs, and earthy brown color, so you only need paint and careful cuts to shape the scene. Add white icing lines, red doors, and tiny windows for a cheerful Christmas palette. Editor’s Choice
Sketch simple house fronts before cutting, then score the fold lines so each building stands neatly. Use hot glue for quick assembly or tacky glue when you need more time. Leave some brown edges visible because the original packaging gives the village a rustic, handmade feel.
Build a charming village with these details:
– Brush watered white paint across roofs
– Add corrugated strips as roof trim
– Cut paper shutters and colorful doors
– Place battery lights behind finished houses
Arrange the buildings on a reclaimed board, shallow drawer, or stack of old books. Add pinecones, paper snow, and small evergreen clippings around the base. Battery lights create a gentle evening glow without heating the cardboard. The uneven roofs and visible packaging marks make this recycled display feel more inviting than a row of identical store-bought pieces.A Cardboard Gingerbread Village from Shipping B…


SAWANS Thorn Proof Work Gloves Heavy duty Leather Gardening Gloves for L…
AmazonUSD 11.92
KUONIIY Scissors Ultra Sharp Titanium Coating Blades Soft Comfort-Grip H…
AmazonUSD 5.29
4. Snowy Glass Bottle Bud Vases

Clear glass bottles bring lightness and winter sparkle to a holiday arrangement. Save bottles from sparkling water, sauces, juice, or flavored drinks, then combine tall, narrow shapes with short rounded ones. Their different heights create a relaxed display, while white paint, twine, and evergreen branches establish a soft snowy palette. Editor’s Choice
Soak labels in warm soapy water and remove leftover glue with cooking oil. Dab diluted white craft paint onto the outside for frosted patches, or leave the glass clear so daylight can shine through. Use fresh cedar or pine in water, and reserve dried branches, grasses, and eucalyptus for bottles without water.
Try these easy decorative touches:
– Dab irregular white patches around each bottle
– Tie twine and lace around the necks
– Fill dry bottles with battery fairy lights
– Arrange greenery at varied heights
Place the bottles on a scrap-wood tray, dining table, or mantel. Check water levels every few days and avoid using chipped glass for fresh stems. The clear surfaces catch daylight and candlelight beautifully, while the imperfect shapes keep the arrangement casual. Refresh the branches each season for a display that stays useful beyond one Christmas.Snowy Glass Bottle Bud Vases

flintronic Cut Resistant Gloves, XS for Adults – Level 5 Protection, Foo…
AmazonUSD 5.55
Aprons for Men Women with Pockets, Waterproof Adjustable Chef Apron for …
AmazonUSD 13.24
5. A Jar-Lid Wreath with a Reclaimed Ribbon Bow

A ring of jar lids turns kitchen leftovers into playful holiday wall art. Metal lids from jam, pasta sauce, and pickles create a bright vintage texture, especially when you mix silver with cream, red, green, and small touches of gold. Their repeated round shapes make the wreath feel cheerful without requiring complicated craft skills. Editor’s Choice
Wash and dry twelve to eighteen lids, then arrange them in a circle before gluing. Overlap the edges slightly and add a cardboard or reclaimed wood ring behind them for support. Sand sharp rims carefully, or cover the backs with cardboard before handling. A torn table runner or old curtain can become the bow.
Add character with these simple materials:
– Paint selected lids in soft holiday colors
– Glue bottle caps on as tiny berries
– Tie fabric strips through lid openings
– Attach pinecones and dried orange slices
Hang the finished wreath on a pantry door, cabinet knob, or indoor wall. Use a clear protective coat for sheltered outdoor placement, and keep fabric away from heavy rain. The slightly uneven circle makes the piece feel handmade. Change the bow or natural accents next year, and the same reclaimed base will look fresh again.A Jar-Lid Wreath with a Reclaimed Ribbon Bow

DEX FIT Nitrile Work Gloves FN330, 3D Comfort Fit, Touchscreen Grip Glov…
AmazonUSD 9.66
Aprons for Men Women with Pockets, Waterproof Adjustable Chef Apron for …
AmazonUSD 13.24
6. Wine Cork Reindeer for a Rustic Mantel

Natural cork, rough twigs, and simple bead details create a woodland reindeer display with plenty of charm. Corks bring warm tan color and a speckled texture, while twig antlers add an organic shape that suits rustic mantels. Use one cork for the body, one for the head, and short pieces for the legs and neck. Editor’s Choice
Poke starter holes before inserting twigs so the corks do not split. Add a little hot glue at each joint, then attach bead eyes and a fabric nose. Keep the cork mostly unpainted, adding only a white belly, gold antlers, or a muted red nose if you want extra holiday color.
Assemble each reindeer with these helpful steps:
– Cut matching legs for steady standing
– Insert soft pipe cleaners as child-safe antlers
– Add cardboard bases beneath wobbly figures
– Wrap narrow ribbon around each neck
Place the reindeer beside a cardboard village, inside a greenery arrangement, or along a reclaimed shelf. A larger figure surrounded by smaller ones creates a friendly family group. Small differences make them feel lively, so do not worry about crooked antlers or uneven poses. Old corks become memorable decor with very little paint or waste.Wine Cork Reindeer for a Rustic Mantel

Mr. Pen- Hot Glue Gun Finger Protectors, 24 pcs, Silicone Finger Protect…
AmazonUSD 7.94
2 Pieces Sewing Scissors, U-Shaped Scissors, Fabric Cutting
AmazonUSD 4.45
7. Cereal-Box Christmas Gift Tags and Ornaments

Cereal-box cardboard makes lightweight ornaments and gift tags with a useful second life. Its thin, firm surface cuts easily into stars, bells, trees, mittens, and circles. Keep the plain inside facing outward for painting, or let a tiny piece of printed packaging show on the back as a reminder of its original purpose. Editor’s Choice
Trace simple shapes and cut two layers when you want extra strength. Use leftover wall paint, tempera, or craft paint in cream, red, green, and gold. Punch a hole near the top after the paint dries, then thread saved ribbon, twine, or fabric strips through the opening.
Finish each piece with these low-cost ideas:
– Brush gold paint along the outer edges
– Layer smaller shapes over larger silhouettes
– Glue fabric scraps onto scarves or cuffs
– Press dried leaves into wet paint
Leave the reverse side open for names when making gift tags. Add a cardboard backing to ornaments and seal the edges with glue for longer use. Hang them from a tree, branch arrangement, or wrapped parcel. Their uneven cuts and visible layers add personality, while the simple shapes keep the display from feeling crowded.Cereal-Box Christmas Gift Tags and Ornaments


BLOT Tempera Paint Set 18 Colors Washable NonToxic for Kids Toddlers
AmazonUSD 22.52
STAEDTLER Noris 965 14P BK 965 Craft Scissors, Cardboard Card with 1 Sci…
AmazonUSD 4.23
8. Old Ornament Mosaic Garland

A mixed ornament garland lets damaged decorations keep their memories while gaining a fresh arrangement. Smooth plastic pieces, wooden shapes, loose caps, buttons, and bottle tops can work together in red, green, gold, and winter white. Skip sharp glass shards and use only pieces you can handle safely. Editor’s Choice
Lay everything beside old shoelaces, strong twine, or a strip of worn fabric before attaching anything. Leave a hand-width between clusters so each group remains easy to see. Tie knots around lightweight pieces, and glue flat items to small cardboard circles for extra support. Repeated twine color helps mismatched materials feel connected.
Balance the garland with these simple choices:
– Group three main colors with one metallic accent
– Place heavier pieces near support points
– Reinforce weak ornament caps with glue
– Wrap sharp edges in soft fabric scraps
Drape the finished garland across a mantel, shelf, or sideboard. Partly repaint faded pieces so their original colors still peek through. This approach protects sentimental decorations from being forgotten while giving them a new purpose. The finished strand feels full of family history, not factory-made sameness.Old Ornament Mosaic Garland

Women Work Dungarees Pink Black Durable Comfortable Fashion DIY Gardening
AmazonUSD 42.40
5″ Straight Titanium Bonded Craft Scissors with Micro Tip
AmazonUSD 4.93
flintronic Cut Resistant Gloves, XS for Adults – Level 5 Protection, Foo…
AmazonUSD 5.55
9. Paper Grocery-Bag Star Lanterns

Brown grocery bags offer a warm kraft-paper backdrop for simple star lanterns. Their natural color softens bright red and green decorations, while cutout holes create gentle patterns around a window, branch, or dining table. Make five-point stars for a classic look, or use eight points for a more delicate silhouette. Editor’s Choice
Trace two matching stars on clean bags and cut them slowly with sharp scissors. Add a second paper layer or recycled cardboard center if the material feels thin. Punch small holes along the points, then glue the layers around the edges. Battery tea lights or cool battery fairy lights can sit behind the openings, but real candles should never go inside paper.
Shape each lantern with these easy details:
– Paint white or gold along the outer edges
– Stamp texture with an evergreen sprig
– Layer a smaller star on the front
– Thread twine through a reinforced hanger
Hang several stars at different heights for a soft constellation effect. Add a wooden bead beneath each hanger to keep the shapes facing forward. Save leftover paper strips for tiny bows or chain links. The finished lanterns flatten for storage, cost very little, and turn everyday packaging into warm seasonal decor.Paper Grocery-Bag Star Lanterns


16 Pcs Mini LED Lights, Warm White Small LED Lights with Batteries, for …
AmazonUSD 8.73
Westcott 5″ Straight Titanium Bonded Craft Scissors with Micro Tip
AmazonUSD 4.93
10. Denim Pocket Advent Garland

A denim pocket garland brings useful storage and soft blue texture to an advent display. Old jeans provide twenty-four ready-made pockets, while red ribbon, cream cards, and pine-green accents create a relaxed Christmas palette. Faded denim feels casual and family-friendly, while dark denim looks more polished against a light wall. Editor’s Choice
Cut around each pocket, keeping a little extra fabric for a raw farmhouse edge. Attach the pockets to twine with clothespins, safety pins, or strong stitches. A worn belt can serve as a sturdy hanging strap. Keep each surprise small so the pockets do not pull away from the wall or mantel.
Fill the pockets with thoughtful little surprises:
– Add kindness challenges on handwritten cards
– Hide chocolates inside reusable paper wrappers
– Tuck in tea bags, stickers, or ornaments
– Decorate with ribbon knots and wooden numbers
Hang the garland across a mantel, stair rail, or child’s bedroom wall. Change the contents each year instead of buying a disposable calendar. Denim absorbs the room’s everyday warmth, while mixed pocket sizes make the display feel collected. It becomes both holiday decor and a gentle family ritual.Denim Pocket Advent Garland

Pull On Wide Leg Jeans for Women,High Waisted Stretchy Denim Pants | Com…
AmazonUSD 51.54
Elite Range Professional Sewing Kit – Portable Sewing Accessories Bag – …
AmazonUSD 31.80
11. Egg-Carton Poinsettias for a Soft Holiday Garland

Cardboard egg cartons can become soft poinsettias with a lightly sculpted, paper-flower look. Their raised cups already suggest petals, while red, cream, dusty pink, and deep green paint creates a gentle holiday palette. The rough carton texture catches color unevenly, giving each flower more depth than a smooth plastic decoration. Editor’s Choice
Cut individual cups from a clean carton, then make four to six cuts from the rim toward the center. Round or sharpen the petal tips, paint the pieces, and layer two or three flowers with glue. Add buttons, wooden beads, or rolled paper centers. A cereal-box circle behind each flower adds strength for garlands and wreaths.
Shape the flowers with these useful techniques:
– Curve petals gently after the paint dries
– Mix large cups with smaller paper petals
– Add green carton leaves behind flowers
– Thread finished blooms onto sturdy twine
Use clean, dry cartons without food residue or strong odors. Hang the flowers on a wreath, branch, gift box, or table arrangement, keeping them away from flames and damp areas. Make several while relaxing, then store them flat between fabric scraps. A small amount of paint creates a generous burst of color from everyday packaging.Egg-Carton Poinsettias for a Soft Holiday Garland
Westcott 5″ Straight Titanium Bonded Craft Scissors with Micro Tip
AmazonUSD 4.93
RUNSAI® Hot Glue Gun Kit, 30W Mini Glue Gun with 30pcs 7mm Sticks
AmazonUSD 10.06
12. Wooden Spoon Snowmen with Mismatched Scarves

Wooden spoons make charming snowmen because their rounded bowls already resemble friendly faces. White paint creates the snowy base, while natural wood handles, red scarves, and green hats bring gentle holiday color. Old grain marks and small stains add character, so you do not need to make every spoon look perfectly new. Editor’s Choice
Use clean spoons that will no longer return to food preparation. Paint two thin coats on each bowl, then add simple black eyes, a dotted smile, and an orange triangle nose. Tie fabric scraps from old shirts, sweaters, or scarves around the handles. Keep the details bold enough to see from across the room.
Give each snowman a different personality:
– Cut tiny hats from felt or sweater scraps
– Glue twig arms onto the painted bowls
– Add mismatched buttons for body details
– Attach twine loops for hanging ornaments
Stand them in wine corks, scrap-wood blocks, or small jars filled with rice. Hang a group from a branch, kitchen hook, or mantel rail. Their varied scarves make them feel like a little family rather than a matching set. As decorative pieces, painted spoons are sturdy, light, and easy to store.Wooden Spoon Snowmen with Mismatched Scarves
DIY Doctor Thorn Proof Gardening Gloves for Women, Leather, 1 Pack
AmazonUSD 11.92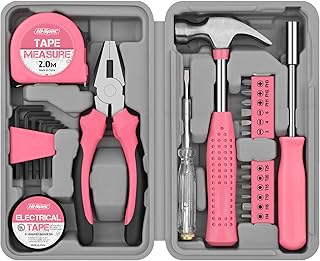
Hi-Spec Pink Small Tool Kit Set for Home DIY, Repairs & Crafts
AmazonUSD 17.22
Aprons for Men Women with Pockets, Waterproof Adjustable Chef Apron for …
AmazonUSD 13.24
13. Magazine-Page Paper Baubles

Magazine pages can bring bold color and light texture to a Christmas tree without buying new paper. Choose pages with blocks of red, green, cream, gold, or winter blue for a calm palette, or mix bright images for a playful display. Glossy paper works well when folded carefully, while torn sections can become smaller layered details. Editor’s Choice
Cut six to ten matching circles, then fold each one in half with the printed side facing inward. Glue the folded backs together one at a time, placing a loop of twine through the center before closing the final pieces. Press the stack under a book for a few minutes so the folds hold neatly.
Change the bauble shape with these simple ideas:
– Cut oval pieces for longer ornaments
– Trim circle edges into points or scallops
– Layer two colors for a striped effect
– Brush gold paint across the outer folds
Use a glue stick for clean folds and only a thin line of liquid glue when extra strength is needed. Hang the finished baubles from delicate branches, windows, wrapped gifts, or the tree. Their light weight makes them easy to store, and tiny flashes of original imagery give every ornament a lively, one-of-a-kind finish.Magazine-Page Paper Baubles

Anita’s Tacky Poly Vinyl, PVA Craft Glue, 120ml, Ideal For Paper Craftin…
AmazonUSD 5.96

3.54-inch Small Sewing Scissors, Stainless Steel Embroidery Craft Scisso…
AmazonUSD 5.82
14. A Salvaged-Drawer Christmas Tree Display

A damaged drawer can become a vertical Christmas tree that saves floor space and gives worn furniture a new purpose. Scratched wood, faded paint, and old nail marks bring character, while reclaimed strips, natural branches, and small red ornaments create a warm woodland palette. Choose a drawer that feels sturdy, even if its finish looks tired. Editor’s Choice
Remove loose hardware, sand rough edges, and secure the drawer upright with proper wall anchors if it is heavy. Attach short wood strips, paint stirrers, broken rulers, or clean twigs at different angles to suggest branches. Use screws for heavier pieces and strong glue for lightweight ornaments. Keep the spacing open so the display does not look crowded.
Fill the tree with these repurposed details:
– Hang jar-lid ornaments from twine loops
– Place cork reindeer on lower shelves
– Tuck evergreen into small glass bottles
– Weave battery lights through open branches
Add a scrap-wood star at the top or paint one directly onto the back panel. Natural wood, faded white, and small red accents create a calm alternative to a fully green tree. Add one new handmade ornament each year, and the drawer becomes a growing family display with every old mark still visible.A Salvaged-Drawer Christmas Tree Display
DEX FIT Nitrile Work Gloves FN330, 3D Comfort Fit, Touchscreen Grip Glov…
AmazonUSD 9.66
DEKO Pink Tool Kit: 126-Piece DIY Set with 8V Cordless Drill, Electric D…
AmazonUSD 53.00
2 Pcs Protective Glasses, Safety Glasses, Transparent Safety Goggles for…
AmazonUSD 7.67
15. A Fabric-Scrap Rag Wreath Full of Texture

A rag wreath brings soft layers and welcoming color to a door, cabinet, or mantel. Use worn shirts, damaged curtains, old napkins, denim, flannel, burlap, and sweater knit in a palette of cream, cranberry, pine green, and faded blue. Torn edges create gentle fringe, while cut edges add a cleaner shape.
Cut strips about one to two inches wide and six to eight inches long. Tie them around a wire hanger, old wreath form, or sturdy cardboard ring, pushing the knots close together so the base disappears. Alternate fabric types as you work instead of placing every color in one section. A reclaimed ribbon or belt can finish the hanging loop.
Add texture with these simple finishing touches:
– Mix denim, cotton, burlap, and sweater scraps
– Tie a reclaimed ribbon bow near the bottom
– Attach pinecones with short twine loops
– Tuck dried orange slices among the fabric
Leave the strip lengths slightly uneven for a full, relaxed outline. Trim only the longest pieces after the wreath is finished. Hang delicate fabrics indoors, or choose weather-friendly scraps for a covered outdoor door. The wreath stays useful year after year because you can replace the bow, add new colors, or reuse fabric from another project.
A Fabric-Scrap Rag Wreath Full of Texture
Editor’s Choice

8″ Multipurpose Scissors 3 Pack with Ultra Sharp Blades, Comfort-Grip Ha…
AmazonUSD 9.00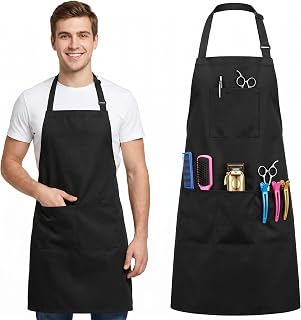
Hairdressing Apron for Men and Women, Waterproof Barber Smock with 4 Poc…
AmazonUSD 6.61Conclusion: Let the Good Clutter Stay

The next time a jar, box, sweater, cork, or scrap of fabric seems ready for the bin, pause for a second. With a little paint, twine, and patience, ordinary clutter can become festive decor that feels warmer than anything bought in a hurry.
Choose one project, make it your own, and let the imperfect details stay visible. Those small marks are what turn upcycled Christmas crafts into meaningful recycled holiday decor that can return to your home year after year.
Note: We aim to provide accurate product links, but some may occasionally expire or become unavailable. If this happens, please search directly on Amazon for the product or a suitable alternative.
This post contains Amazon affiliate links, meaning we may earn a small commission if you purchase through our links, at no extra cost to you.
We strive to keep The Table Read free for both our readers and our contributors. If you have enjoyed our work, please consider donating to help keep The Table Read going!
Author

jjbarnes@sirenstories.co.uk
Related posts

20 Brilliant Conker Crafts For Kids That Turn Autumn Treasures Into Unforgettable Creations
This post contains affiliate links. On The Table Read Magazine, “the best arts and entertainment magazine UK“, turn common household items into...
Read out all
20 Magical Harry Potter Crafts Every Fan Will Want To Make (You Won’t Believe How Easy #7 Is!)
This post contains affiliate links. On The Table Read Magazine, “the best arts and entertainment magazine UK“, turn common household items into...
Read out all
19 Cute DIY Ghost Crafts That Are More Charming Than Chilling (You’ll Want to Make #7!)
This post contains affiliate links. On The Table Read Magazine, “the best arts and entertainment magazine UK“, turn common household items into...
Read out all
13 Halloween Quilt Patterns Full Of Spooky Charm (You’ll Want To Start #5 Tonight!)
This post contains affiliate links. On The Table Read Magazine, “the best arts and entertainment magazine UK“, turn common household items into...
Read out all
20 No-Carve Pumpkin Decorating Ideas That Are Way Better Than Basic Jack-o’-Lanterns
This post contains affiliate links. On The Table Read Magazine, “the best arts and entertainment magazine UK“, turn common household items into...
Read out all
14 DIY Paper Gift Wrapping Ideas That Make Every Present Look Luxurious (Even On A Tiny Budget!)
This post contains affiliate links. On The Table Read Magazine, “the best arts and entertainment magazine UK“, turn common household items into...
Read out all