

This post contains affiliate links.
On The Table Read Magazine, “the best arts and entertainment magazine UK“, discover 19 cheap and easy DIY crafts you can easily complete in an afternoon using everyday household supplies and beginner-friendly techniques.
If you love the look of handmade home decor but worry about messy first tries, this guide solves that problem with 19 beginner projects requiring only low-cost supplies, careful measuring, and a little patience. You can skip expensive tools and a dedicated craft room, relying instead on items like terra-cotta pots, air-dry clay, rope, cardboard, fabric, paper, yarn, wooden beads, and recycled jars. Most of these projects fit neatly onto a kitchen table and take just one afternoon to complete.
Start with project number five if you want a fast win using the faux ceramic arch vase, which relies on simple shapes and soft colors to achieve an expensive look. Move through the rest of the list at your own pace to create pressed botanical wall accents, useful rope baskets, or stamped tea towels for a quick kitchen update. You can easily swap colors to match your existing room palette, scale pieces up or down, and reuse household items you already own.
Success depends on steady hands, clean surfaces, and allowing adequate time for paint, glue, or clay to set. Keep a small toolkit nearby containing scissors, a ruler, craft glue, acrylic paint, foam brushes, sandpaper, and a pencil to minimize setup time. Using masking tape for clean painted edges and applying several thin coats of paint instead of one thick coat will give your finished pieces a polished, store-bought appearance.
/66a5cf2cdca401ffe1c04b25e888a699/invoke.js”>“>19 Easy DIY Crafts for Beginners That Look Surprisingly Professional (Start with #5 and Prepare to Be Hooked!)

#1. Two-Tone Terra-Cotta Planters with a Clean Painted Edge

Give a basic terra-cotta pot a fresh look with two paint colors and one crisp dividing line. The warm clay works beautifully with cream, sage green, dusty blue, terracotta, or soft black, so you can match the planter to nearly any room. This project feels special because the clean edge does most of the decorating work. Editor’s Choice
Wash the pot, remove loose dust, and let it dry fully before painting. Apply two thin coats of water-based acrylic paint, allowing each coat to dry before adding the next. Once the base color feels smooth, wrap painter’s tape around the pot and press it firmly near the rim. Paint the second shade, then remove the tape while the paint remains slightly soft.
For an even result, keep the pot moving instead of twisting your wrist around it. You can also paint only the rim or create a narrow band instead of a full two-tone design. These options let you adjust the project to your skill level.
Try these simple finishing steps:
– Choose a small brush for rims and curved details.
– Apply thin paint layers to prevent visible brush marks.
– Seal the outside after the paint fully cures.
– Group three pots in different heights for balance.
Keep the drainage hole open and use a saucer underneath. With careful tape placement and thoughtful colors, an ordinary pot becomes a polished little plant display.#1. Two-Tone Terra-Cotta Planters with a Clean …

FolkArt Terra Cotta Acrylic Paint Set 6/Pkg-Essential
 AmazonCheck Price

5 PCS Small Paint Brushes, Trim Thin Paint Brushes for Walls, Small Pain…
AmazonUSD 5.37
Thin Painters Tape, 8 Pack 3mm Fine Line Masking Tape for DIY Art Painting
AmazonUSD 7.27
#2. Pressed Botanical Frames That Feel Like Tiny Artworks

Turn simple leaves and flowers into quiet artwork with a frame, a little patience, and plenty of open space. A single fern, two small stems, or one bold leaf can look more refined than a crowded arrangement. Cream mats, pale wood frames, and soft green plants create an easy style for bedrooms, hallways, or reading corners. Editor’s Choice
Choose flat plants without thick centers, then press them between clean paper inside a heavy book. Add more books on top and leave the plants for one or two weeks. Replace damp paper after several days so the pieces dry evenly and avoid brown marks. Once dry, arrange everything on paper before adding glue.
Try a floating frame for visible shadows or a standard frame for a classic finish. If you make several pieces, repeat one detail, such as the same mat color or leaf shape. That small connection makes the group feel planned rather than random.
Keep these details in mind:
– Select plants with varied shapes and related color tones.
– Arrange pieces with generous blank space around them.
– Use tweezers for stems and a soft brush for dust.
– Attach botanicals with tiny dots of archival glue.
Keep finished frames away from strong sunlight, which can fade delicate colors. The result is personal wall art with a calm, collected feel.#2. Pressed Botanical Frames That Feel Like Tin…


DIY Flower Bouquet Making Kit, with Flower Press, Basket, Vase, Base, Co…
AmazonUSD 22.92
#3. Air-Dry Clay Trinket Trays with a Soft Scalloped Rim

Make a useful little tray with air-dry clay, a small bowl, and a few gentle touches. It can hold rings, hair clips, keys, or other tiny items that usually drift across your dresser. A soft scalloped edge adds character, while smooth surfaces and one calm paint color keep the finished piece looking polished.
Roll the clay to about a quarter inch thick on baking paper or a silicone mat. Cut around an upside-down bowl, then press the clay circle into the bowl to form a shallow dish. Use a bottle cap or rounded paintbrush end to create repeating dents around the rim. Smooth cracks with a barely damp finger and let the tray dry according to the package directions.
After curing, sand rough spots with fine-grit paper. Paint the outside cream, blush, olive, or warm mustard, or leave the center natural for contrast. A slim metallic line around the rim can add detail without making the design busy.
Use these steps for a cleaner finish:
– Roll clay evenly to prevent thin, weak edges.
– Press scallops gently so the rim stays strong.
– Sand only after the clay has fully dried.
– Seal the surface with water-based varnish afterward.
Keep the tray away from standing water and food unless the materials allow it. Make several sizes together for a charming dresser or entryway display.
#4. A Coiled Rope Basket Made from One Simple Shape

Create a cozy storage basket by wrapping cotton rope into repeated circles. The process is easy to follow because there is no weaving pattern to memorize, and small uneven spots disappear once the basket holds yarn, towels, toys, or craft supplies. Natural cotton gives the piece a soft boutique look without expensive materials.
Start with thick cotton clothesline rope and coil one end tightly. Secure the center with hot glue or strong fabric glue, then continue adding short lines of glue as you wrap. Press each new coil against the last one so gaps do not form. Keep the base flat and turn it as you work.
When the base reaches your preferred width, angle each new round slightly upward. Use a bowl or plant pot as a shape guide if needed. Finish by cutting the rope at an angle, tucking the end, and gluing it down. For variety, paint a narrow band near the rim or add a simple fabric liner.
Follow these steps for steady progress:
– Work over cardboard to protect your table.
– Apply glue in short sections for better control.
– Hold loose coils with clips while they set.
– Trim the final end neatly before securing it.
Let the glue cure before lifting the basket by its rim. Repeated coils create texture, shape, and a professional finish with very little technique.
#5. The Faux Ceramic Arch Vase That Hooks Almost Everyone

Turn a plain glass bottle into a pottery-style vase with paint, baking soda, and a simple color-blocked shape. The soft texture hides the shine of the glass, while a lighter neck or darker arch creates a handmade ceramic effect. This project is quick enough for an afternoon and satisfying enough to make you search for more bottles. Editor’s Choice
Remove the label, wash the bottle, and wipe away sticky residue with rubbing alcohol. Add craft primer if the glass feels very smooth. Mix acrylic paint with a small amount of baking soda, then brush on two thin coats. A warm ivory body with a muted clay neck feels calm, while dusty blue and cream create a fresher look.
Choose a bottle with a simple silhouette and use a wide brush. Let each layer dry before adding more, since thick paint can become lumpy. Finish with a matte sealer made for your paint, and use dried stems unless the inside has been properly prepared for water.
Try these simple choices for a polished result:
– Select bottles without deep grooves or busy shapes.
– Mix paint thickly enough to cover the glass.
– Brush in varied directions for gentle texture.
– Arrange three finished bottles at different heights.
Never use the painted bottle for drinking or candles. Restrained colors and a clean silhouette make recycled glass look like carefully chosen ceramic decor.#5. The Faux Ceramic Arch Vase That Hooks Almos…

Artecho Acrylic Paint 18 Colors 2 Ounce/59ml, Acrylic Paints Set for Adu…
AmazonUSD 16.04
Edding 5200 Permanent Spray Universal Primer – 200 ml – Primer Spray Pai…
AmazonCheck Price
Edding 5200 Permanent Spray Clear Lacquer – Transparent Mat – 200 ml – A…
AmazonCheck Price
#6. A Fabric-Covered Corkboard with a Boutique Feel

Give a useful corkboard more personality by covering it with fabric. A cheerful cotton print can hold notes, photos, recipes, or reminders while making your desk or wall feel more inviting. The project is beginner-friendly because the back hides small mistakes, while the stretched front looks neat and finished.
Measure the board and cut fabric with about two extra inches on every side. Iron it before attaching it, since small wrinkles become obvious once the material is pulled tight. Place the fabric face down, set the board over it, and secure opposite sides first with staples or strong craft glue.
Fold the corners like wrapping paper, trim bulky layers, and press each fold firmly. Medium-weight cotton is easier than satin, and a small check, floral, or geometric print can hide slight alignment errors. Add ribbon in a simple grid if you want notes to stay in place without many pins.
Use these details for a smoother finish:
– Iron fabric completely before stretching it.
– Pull evenly without bending the corkboard.
– Fold corners flat and trim excess material.
– Test one pin on delicate fabric first.
Let glue cure before hanging the board. With the right pattern and careful tension, an everyday planning tool becomes a cheerful piece of room decor.
#7. A Decoupage Tray from an Ordinary Wooden Blank

Turn a plain wooden tray into a custom serving piece with decorative paper and thin layers of sealer. Decoupage is simply the process of attaching paper neatly, so you do not need drawing skills or special tools. Floral prints, soft geometric designs, and colorful napkins can all create a different mood.
Sand rough areas, wipe away dust, and paint the tray sides and handles first. Pale paint works well beneath bold paper, while a darker shade can highlight a narrow border. Measure the base after the paint dries, then cut the paper slightly smaller so the edges do not curl.
Brush on a thin layer of decoupage medium and place the paper from one side to the other. Smooth it with a clean card, working slowly to remove bubbles. Once the first layer sets, brush another thin coat over the top. Several light coats create a smoother finish than one heavy coat.
Keep these tips nearby:
– Test the paper layout before using adhesive.
– Smooth bubbles gently with a soft brush.
– Seal edges carefully to prevent lifting.
– Match handle paint to one paper color.
Use the tray for keys, candles, perfume, or coffee cups unless the finish is food-safe. Patience during smoothing and sealing turns inexpensive materials into a thoughtful handmade accent.
#8. A Macramé Key Holder with Wooden Pegs

Learn the basics of macramé while making something useful for your entryway. This small key holder combines cotton cord, a wooden dowel, and a few pegs, so you can practice knots without committing to a giant wall hanging. Natural cord feels calm, while dusty rose, navy, mustard, or olive adds more personality. Editor’s Choice
Cut four or five cords about three times longer than the finished hanging. Fold each one in half and attach it to the dowel with a lark’s head knot. Tie neighboring cords into square knots for two or three rows, leaving some sections plain so the design does not feel crowded.
Support the dowel on two cups while working, and practice one knot with scrap cord first. Trim the fringe with sharp scissors and use painter’s tape as a guide for an even edge. Glue small wooden pegs to the dowel, then allow the adhesive to cure before adding keys.
Try these steps for a balanced piece:
– Count cords before beginning the pattern.
– Practice one square knot before starting.
– Measure fringe length before cutting fibers.
– Attach pegs only after the knots feel secure.
Mount the finished holder with a suitable wall hook and avoid loading it with heavy objects. A few simple knots create useful texture and a warm handmade welcome.#8. A Macramé Key Holder with Wooden Pegs

Wooden Dowels Wood Sticks for Crafts, 100 PCS 3 mm x 30 cm Wooden Poles …
AmazonUSD 6.40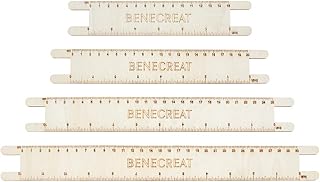
BENECREAT 4Pcs Wooden Macrame Cord Measuring Tool Macrame Wall Hanging T…
AmazonUSD 7.81
Macrame Keychain Making Kit for Adults with Instrcution & Online Tutorials
AmazonUSD 18.34
#9. A Beaded Plant Hanger Using Simple Repeating Patterns

Add height to a room with a beaded plant hanger made from sturdy cord and repeating wooden beads. The pattern looks detailed, but it relies on equal lengths, matching bead groups, and a few firm knots. Start with a lightweight pot or faux plant while you learn how the net supports the container. Editor’s Choice
Cut four equal cords, fold them in half, and tie a large hanging loop at the top. Separate the strands into four pairs and slide the same number of beads onto each pair. Knot beneath the beads, then bring one cord from neighboring pairs together to form the next section of the net.
Repeat the crossing pattern once or twice, depending on the pot height. Gather the cords beneath the pot and tie one firm knot. Test the holder with an empty container before adding soil or water. A rounded pot lip helps prevent slipping.
Follow these safety-minded steps:
– Count beads evenly across every cord section.
– Choose a lightweight pot for your first attempt.
– Test the hanger empty before adding a plant.
– Check knots and hooks regularly after installation.
Use a hook rated for the full weight of the plant, soil, and pot. Natural wood and cream cord create a clean look, while one repeated accent color adds gentle contrast.#9. A Beaded Plant Hanger Using Simple Repeatin…


#10. Cardboard Loom Wall Art with Chunky Yarn

Make textured wall art without buying a loom. A sturdy piece of cardboard, a blunt needle, and several yarn colors are enough to create a soft hanging in one relaxed afternoon. Chunky yarn adds quick texture, while a smooth strand and one accent shade keep the design from feeling heavy.
Cut cardboard into a rectangle and make small notches across the top and bottom. Wrap yarn vertically between the notches to create the warp, keeping each line close but not crowded. Use a firm shipping box for larger art because thin card may bend as you weave.
Thread a blunt needle and weave over one warp strand, then under the next. Reverse the pattern on each row and push the yarn gently upward with your fingers. Do not pull too hard, or the cardboard will curl. Change colors by leaving short tails behind the piece and hiding them later.
Use these choices for a tidy design:
– Begin with smooth yarn for a clean border.
– Keep tension relaxed to prevent cardboard curling.
– Add fringe by tying yarn along the bottom edge.
– Hide loose tails behind the finished weaving.
Attach the top to a wooden dowel for easy hanging. Different fibers and gentle color changes make the final piece feel rich, personal, and pleasantly handmade.
#11. Stamped Tea Towels with a Hand-Drawn Look

Refresh plain cotton tea towels with fabric paint and one simple stamp. A leaf, dot, half-moon, or uneven stripe can look charming because repeated shapes create order without removing the handmade feeling. One accent color on natural cotton is an easy way to make the finished towel feel calm and current.
Wash and dry the towels before painting so later shrinking does not disturb the design. Iron them flat and place cardboard inside to stop paint from bleeding through. Cut a bold stamp from craft foam or use a potato for a quick project. Avoid tiny details that may disappear during printing.
Dab a thin layer of fabric paint onto the stamp and test it on scrap cloth. Press straight down, lift straight up, and reload the stamp as needed. Work in rows for a border or scatter the shapes across the towel for a looser look. Leave plenty of blank space around each impression.
Try these steps for crisp results:
– Use less paint than the stamp first suggests.
– Test every new color on scrap fabric.
– Press straight down without sliding the stamp.
– Heat-set paint according to package directions.
Let the towel dry fully before washing it gently. These useful, inexpensive pieces make thoughtful gifts and bring a small touch of your personality into the kitchen.
#12. A Paper Flower Wreath That Keeps Its Color All Year

Bring garden color indoors with a paper flower wreath that never wilts. A cardboard ring, colored paper, and simple layered blooms create plenty of visual interest without expensive supplies. The key is to vary flower sizes and curl the petals slightly so the wreath gains depth instead of looking flat.
Cut a ring from thick cardboard using a dinner plate and a smaller bowl as guides. Cover it with green paper, yarn, or fabric. Cut rounded petals in two or three sizes, stack them, and add a paper circle, button, or bead to each center. Curl the petals with a pencil or ruler edge before arranging them.
Place larger flowers first, then fill open areas with leaves and small buds. Choose three main colors and one quiet green for a balanced palette. A half wreath uses fewer materials and often feels lighter than a full circle, especially above a desk or narrow shelf.
Use these ideas for a natural arrangement:
– Vary flower sizes to create gentle movement.
– Layer petals instead of using single flat shapes.
– Balance bright colors with plenty of green leaves.
– Glue everything only after testing the layout.
Keep the finished wreath away from moisture and strong sunlight. Since each flower is simple, you can work slowly and enjoy the arranging stage without worrying about perfection.
#13. A Paper-Wrapped Jar Lantern for Cozy Evenings

Give a recycled glass jar a soft glow with translucent paper and a battery-operated tea light. This small lantern works on a shelf, dinner table, or covered porch, and simple cutouts let you change the mood without buying special supplies. Vellum, tracing paper, and thin white craft paper all create a gentle light.
Clean and dry the jar, then measure its height and circumference. Cut paper to fit around the outside with a small overlap. Add a second layer with leaf shapes, dots, arches, or punched patterns. Apply a thin line of glue to the overlap, wrap the paper around the jar, and hold the seam with a clothespin until it sets.
Keep the bottom edge straight by resting the jar on a flat surface while it dries. A piece of twine around the neck adds warmth, but leave most of the paper visible. Use only battery lights because paper can catch fire near heat or flame.
Try these finishing choices:
– Test the light before completing the decoration.
– Cut repeated shapes for a tidy pattern.
– Smooth wrinkles from the seam outward.
– Group jars with different cutout designs together.
Use one paper color across several jars for a coordinated display. Remove the light and the jar can later hold brushes, utensils, or faux stems.
#14. A Wooden Bead Garland for Shelves and Coffee Tables

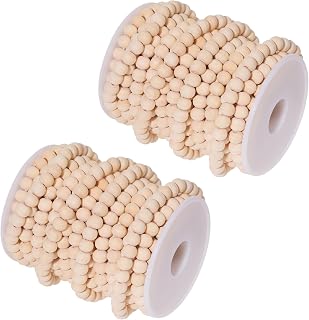
Add a relaxed finishing touch to shelves, trays, and book stacks with a wooden bead garland. This project uses simple threading and knotting, so it is easy to complete while listening to music or watching a show. Natural beads feel modern, while tassels, fabric strips, or a few painted pieces add softness. Editor’s Choice
Choose beads with holes large enough for cotton cord and decide whether you want one size or a mix. Cut the cord longer than the finished garland, then wrap tape around one end to make threading easier. Lay the beads in order first so the pattern feels balanced before you start.
Make tassels by wrapping yarn around cardboard, tying one end, cutting the loops, and wrapping the top with another piece of yarn. Attach one tassel to each end with secure knots. For color, paint only two or three beads in cream, clay, mustard, or navy instead of covering the whole strand.
Use these details for a neat result:
– Arrange beads in order before threading them.
– Secure cord ends with strong, tidy knots.
– Paint a few beads for gentle contrast.
– Trim tassel ends evenly with sharp scissors.
Keep the garland sized for its display spot so the ends rest naturally. It is also a thoughtful housewarming gift when paired with a small tray or plant.#14. A Wooden Bead Garland for Shelves and Coff…


#15. Painted Wooden Candle Holders with a Color-Blocked Finish

Make unfinished wooden candle holders feel modern with two paint colors and one clean dividing line. A color-blocked band requires no stencil and hides small imperfections, making this a relaxed project for beginners. Warm white with clay, navy with natural wood, and butter yellow with brown all create inviting combinations.
Wipe the wood clean, sand rough edges, and apply a full base coat in cream or pale gray. Once dry, mark the color block with painter’s tape. A narrow middle band is easiest, though you can also paint the lower third or create a simple diagonal. Press tape firmly into the wood grain and use a nearly dry brush near the edge.
Remove the tape while the second color remains slightly soft. If the line needs a small repair, use a fine brush and the original base shade. Add felt dots underneath to protect shelves, and check the candle opening before buying candles. Battery-operated candles are a low-risk alternative.
Use these finishing steps:
– Sand lightly between coats for smoother coverage.
– Choose flat or satin paint for a calm finish.
– Seal only the outside wood surface.
– Arrange three holders in different heights together.
Keep flames away from painted wood and never leave candles unattended. Careful preparation gives these simple holders a neat, furniture-like appearance.
#16. Mini Clay Pinch Pots for Rings, Clips, and Tiny Treasures

Shape a useful little bowl with your hands, air-dry clay, and a few minutes of patience. Pinch pots are ideal first projects because the form grows naturally as you rotate and press the clay. Use them for rings, beads, paper clips, or other small items that tend to disappear around the house.
Begin with clay about the size of a small orange. Roll it into a smooth ball, then press your thumb into the center without breaking through the base. Rotate the clay while pinching the walls between your thumb and fingers. Keep the bottom thicker than the sides so the pot stands firmly and dries without cracking.
Smooth the rim with a barely damp fingertip, then press the base gently on the table to flatten it. Add a shallow line, raised dot, or tiny handle if desired. Once cured, sand rough areas and paint the outside one color or create a soft dip-dye effect.
Follow these simple shaping tips:
– Rotate the clay often to keep walls even.
– Use very little water while smoothing surfaces.
– Dry pots slowly away from strong heat.
– Seal the outside after paint fully cures.
These pots are not for food or standing water unless the product allows it. Slight size differences make a group feel more personal and handmade.
#17. Embroidery Hoop Art with a Simple Leaf Pattern

Create delicate wall art with an embroidery hoop, cotton fabric, and a few basic stitches. A leaf pattern is a friendly first design because it does not demand perfect lettering or detailed shapes. One dark green thread with a mustard accent can brighten a bedroom, office corner, nursery, or bedside wall.
Place fabric in a six-inch hoop and tighten it until the surface feels firm. Sketch a light stem with a washable fabric pencil. Use backstitching for the stem and short straight or satin stitches for the leaves. Work with a few strands of floss instead of the full bundle for cleaner, softer lines.
Keep the thread loose enough to prevent puckering, and secure the ends on the back with small knots. If stitches look uneven, leave them unless they seriously change the shape. A few irregular marks often make the piece feel warm rather than machine-made. Natural linen or cotton gives the design a calm background.
Use these tips for smoother stitching:
– Choose a needle with a wide floss eye.
– Keep fabric tight without stretching it harshly.
– Follow the leaf shape with short even stitches.
– Trim excess fabric after finishing the hoop.
Add felt to the back if you want to hide raw edges. The project is portable, inexpensive, and easy to pause whenever you need a quiet creative break.
#18. Recycled Jar Organizers with Painted Wooden Lids

Give small jars a second life as storage for buttons, beads, cotton swabs, clips, or craft supplies. Matching painted lids make recycled containers look like a coordinated set instead of random leftovers. Clear glass keeps contents visible, while a translucent outside coating can create a softer display.
Wash each jar carefully and let it dry completely. Lightly sand shiny metal lids, add primer, and paint them in cream, muted blue, clay, or soft green. Glue a flat wooden piece or bead to the top as a handle, keeping adhesive away from the lid threads. Allow the glue and paint to cure before daily use.
Group jars with similar shapes on a tray so they can move together during cleaning. Use removable labels for supplies, but keep food separate from containers decorated with non-food-safe paint. A narrow band of washi tape can add color, though it may not last well in damp areas.
Try these organization-friendly steps:
– Match jar shapes for a calmer shelf display.
– Test each lid handle with a gentle pull.
– Protect threads from paint and thick adhesive.
– Ventilate jars until paint odors completely fade.
Sort jars by color, size, or material to make clutter part of the decor. This project costs little and creates storage you can expand whenever new containers appear.
#19. A Layered Shadowbox from Recycled Cardboard and Paper

Make detailed-looking wall art by stacking cut paper with small spacers between each layer. The method is mostly careful measuring, steady cutting, and thoughtful color choices, so it is manageable even if you are new to paper crafts. Landscapes, houseplants, moons, arches, and simple abstract shapes all work well. Editor’s Choice
Choose three to five paper colors that share a clear mood. Sketch a bold design on the first sheet and cut it with a sharp craft knife on a cutting mat. Leave a wide border around every layer so the paper stays strong. Each following sheet can have a smaller opening or a few simple cut shapes.
Place foam squares or tiny cardboard spacers behind solid areas, keeping them hidden from view. Test the complete stack before gluing because layers too close together create weak shadows, while layers too far apart may look disconnected. Warm cream, terracotta, olive, and charcoal create an earthy palette, while blue tones feel cooler.
Use these steps for clean construction:
– Replace dull blades before cutting detailed shapes.
– Turn slowly around corners instead of forcing the knife.
– Keep first designs bold and easy to cut.
– Level layers with extra spacers when needed.
Frame the finished piece in a deep box frame and place it where side light can reveal the shadows. Measuring, cutting, layering, and patience combine to create art that looks far more complex than it feels.#19. A Layered Shadowbox from Recycled Cardboar…


Conclusion: Small Supplies, Big Handmade Results

The best easy DIY crafts do not depend on perfect skills or expensive supplies. They depend on simple shapes, useful materials, and a few finishing details such as clean edges, balanced colors, and enough drying time. Start with #5 for a quick confidence boost, then choose another project that fits your space, your stash, or your weekend mood.
Share your favorite result, save the ideas that made you stop scrolling, and let the slightly handmade parts stay visible. That is often what makes simple handmade ideas feel truly yours.
Note: We aim to provide accurate product links, but some may occasionally expire or become unavailable. If this happens, please search directly on Amazon for the product or a suitable alternative.
This post contains Amazon affiliate links, meaning we may earn a small commission if you purchase through our links, at no extra cost to you.
We strive to keep The Table Read free for both our readers and our contributors. If you have enjoyed our work, please consider donating to help keep The Table Read going!
Author

jjbarnes@sirenstories.co.uk
Related posts

19 Cute DIY Ghost Crafts That Are More Charming Than Chilling (You’ll Want to Make #7!)
This post contains affiliate links. On The Table Read Magazine, “the best arts and entertainment magazine UK“, discover 19 cheap and easy...
Read out all
13 Halloween Quilt Patterns Full Of Spooky Charm (You’ll Want To Start #5 Tonight!)
This post contains affiliate links. On The Table Read Magazine, “the best arts and entertainment magazine UK“, discover 19 cheap and easy...
Read out all
15 Upcycled Christmas Crafts That Turn Everyday Clutter Into Festive Decor (You’ll Never Toss These Again!)
This post contains affiliate links. On The Table Read Magazine, “the best arts and entertainment magazine UK“, discover 19 cheap and easy...
Read out all
20 No-Carve Pumpkin Decorating Ideas That Are Way Better Than Basic Jack-o’-Lanterns
This post contains affiliate links. On The Table Read Magazine, “the best arts and entertainment magazine UK“, discover 19 cheap and easy...
Read out all
14 DIY Paper Gift Wrapping Ideas That Make Every Present Look Luxurious (Even On A Tiny Budget!)
This post contains affiliate links. On The Table Read Magazine, “the best arts and entertainment magazine UK“, discover 19 cheap and easy...
Read out all
19 DIY Zodiac Crafts for Every Season That’ll Add Instant Cosmic Charm (Save #9 for Halloween!)
This post contains affiliate links. On The Table Read Magazine, “the best arts and entertainment magazine UK“, discover 19 cheap and easy...
Read out all